
1 Jul
Shifting stones and growing weeds often ruin outdoor spaces that lack the right joint sand. Using a unique sealing product is the best way to keep your hardscape level.
Ready to stabilize your outdoor living space? Order premium polymeric sand for porcelain pavers today or call our Florida showroom at (561) 998-5000.
Polymeric sand for porcelain pavers is a unique mix of sand and binders that hardens when wet to lock stones in place. This product fills the gaps in a sand-set layout to block weeds and keep ants from building nests under the tiles. This sand is the best choice for a tough outdoor area because it stays flexible enough to handle ground shifts while keeping a strong bond. Per the Environmental Protection Agency, these systems allow water to reach the soil while holding heavy weight and traffic. By using this sand, you create a surface that needs very little care and stays level for many years in a wet climate like Florida.
When you plan a new outdoor space in Florida cities like Jupiter or Fort Myers, you must choose the right joint stuff. For porcelain pavers, a sand-set method is the only way to go. Instead, you will use polymeric sand for porcelain pavers to fill the gaps between your tiles. This product is a mix of fine sand and special grains that harden when they get wet.
This stuff works as a strong glue for your patio or walk. It is a top choice instead of mortar for sealing the spaces between your tiles. Once you sweep the sand into the joints and add water, the grains turn the sand into a firm bond. This bond holds the tiles in place but still allows for some movement in the ground. This trait is vital for outdoor areas that face high heat and heavy rain.
The use of this sand also helps with water flow. In areas like Boca Raton and Tampa, heavy storms are common. A sand-set base lets water soak through the joints and into the earth below. This process mimics permeable pavements that help manage stormwater in city spots. By letting water pass through, you prevent large pools from forming on your patio surface.
Joint strength is one of the top reasons to use polymeric sand for porcelain pavers. Old sand can wash away during a Florida rain. Polymeric sand stays in place because it binds to the edges of the porcelain. This keeps your pavers from shifting or tilting over time. It creates a flat and safe surface for your family and guests to walk on.
A stable joint also protects the base of your project. If sand washes out, the bottom layer can become weak. This leads to low spots or cracked pavers. Using a high-quality joint sand ensures that your outdoor space stays tough for many years. It is a simple step that saves you from high costs later.
Nobody wants to spend their weekends pulling weeds from between their pavers. Well-set sand creates a solid seal that stops weeds from growing in the joints. It also blocks ants and other bugs from digging through the sand to build nests. This shield keeps your patio looking clean and new without the need for strong sprays.
This seal is much better than plain sand. Plain sand offers no wall to seeds or pests. By choosing a polymeric mix, you build a shield for your project. This is a key part of keeping a low-care home in a hot place. You can enjoy your outdoor area more and work on it less.
Building a lasting outdoor space starts with a solid base. You must prepare the ground the right way before you apply polymeric sand for porcelain pavers. Good ground work ensures that your patio stays flat and drains well.
This job involves clearing the site, setting the right slope, and laying down the base stone. These steps help stop shifting and sinking in your new outdoor area. A good base is the main part of any stone project.
The first part of the job is clearing the area and digging to the right depth. You need to remove all grass and soft soil from the site. It is vital to create a slight slope so that water does not pool on your pavers.
A small tilt allows rain to run off the surface and move away from your home. Oregon State University notes that a slight slope is needed to prevent water from ponding. This drainage is key for the long life of your sand-set system.
The Environmental Protection Agency says that a proper base for porous surfaces includes a crushed stone layer. This stone base provides a strong support for your pavers and helps with water flow.
Using a sand-set method for porcelain paver setup offers great strength. This method allows the ground to shift slightly without cracking the tiles. It also makes it easier to replace a single tile if one gets damaged in the future.
By taking the time to prepare the base the right way, you set the stage for a great outdoor space. Proper base work combined with the right sand will keep your patio looking great for many years.
Once you have a level base, you can start the work of placing your stone. Using a sand-set method is the best way to do this job. It gives the stone the room it needs to stay in place. A sand-set path also helps water flow. The Environmental Protection Agency says a stone bed is a key part of these plans. This layer helps the ground soak up rain and stops runoff.
You must make sure that water does not pool on your new patio. To stop this, you should set your pavers on a slight slope. Experts say a slope of about 2 degrees is best for most jobs. This angle is enough to guide water away from your home. It keeps the area dry and safe for walking. When you use this slope, you protect your stone and the ground from harm. This is why a sand-set plan is good for drainage.
As you lay each piece, check the level often. You do not want high or low spots where water can sit. A long straight board can help you see if the slope is even. Keeping the slope steady means your path will last for a long time. It also makes the final look much cleaner.
Placing the pavers by hand helps you keep them tight and even. You should not slide the stone into place. This can ruin the flat sand bed. Instead, drop each piece straight down onto the sand. This keeps the bed smooth. If you need to move a paver, lift it all the way up and set it down again. This step is key for a flat surface that does not shift later.
You must use spacers between every stone you lay. These small tools make sure your joints are at least 3/16 of an inch wide. This gap is needed for good water flow and joint strength. If the stones are too close, they may crack as the ground moves. Following these rules will lead to a better result for your work.
After you have placed all your stones, you are ready for the final step. The gaps you left are now ready to be filled. The type of fill you pick is very important for the life of your patio. Most pros now use polymeric sand for porcelain pavers to lock the stones in place. This special sand hardens when it gets wet. It creates a strong bond that stops weeds from growing in the cracks. It also keeps bugs out of the sand bed.
Make sure all your pavers are clean and dry before you add the sand. Any dirt on the surface can get trapped. This can make the patio look messy. Once the sand is in, your work will be strong and ready for use. A sand-set base paired with the right joint sand is the best way to build a lasting outdoor space.
The last step of a sand-set porcelain paver project is to fill the joints. Using top-grade polymeric sand for porcelain pavers ensures that your outdoor space stays firm and looks great for a long time. This sand fills the gaps between pavers to create a strong bond. It stops the pavers from moving but still lets water drain through. Doing this work the right way is needed to prevent most problems like loose tiles or water that sits on top of the stone.
Check the weather before you start the task. You will need a window of clear skies for at least twenty-four hours to let the sand set the right way. Before you start, make sure the porcelain pavers are bone dry. Water on the top of the pavers will make the sand stick and leave a film.
If the pavers are damp from morning dew, the sand will clump and fail to fill the gaps. This can lead to weak joints that will wash out in the first storm. You must also check that the gap widths match the rules. For most porcelain paver jointing sands, the best joint width is usually less than one inch. Keeping the same gap size between pavers lets the sand fall deep into the cracks. This helps the sand give the best support to the whole area.
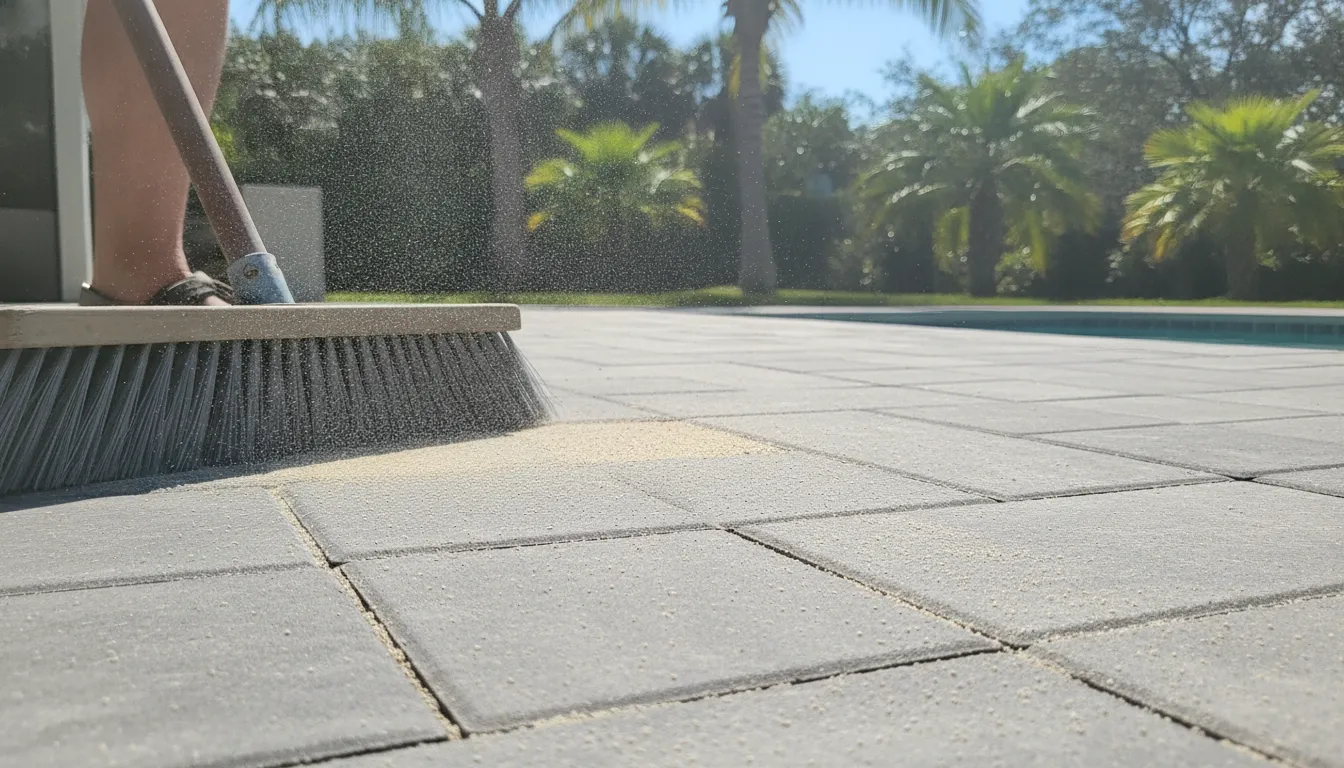
The work starts by pouring the sand over the dry pavers. Use a broom to sweep the sand into the gaps at a 45-degree angle. This way, the broom hairs do not pull sand out of the joints you just filled. Be gentle when you sweep. Do not push too hard on the broom or you might pull sand out from the deep parts of the gaps. The 45-degree angle is key because it lets the broom glide over the cracks without catching on the edges of the porcelain tiles.
Once the gaps are full, you must settle the sand. For porcelain pavers, like a 3cm porcelain paver installation, use a tool to shake the sand down into the joints. You can use a mallet or a machine with a pad to do this. This step gets rid of air and makes the joint firm and dense. If you see low spots after the first pass, add more sand and sweep again. Do this until the joints are level with the top of the stone.
The sand turns into a solid bond once you mist it with water. This creates a seal that is firm but can still move a little with the earth. A properly applied polymeric sand joint stops weeds from growing and keeps bugs out from between your pavers. This tough seal also helps with surface drainage so water does not sit in one spot. It also keeps the dirt under the pavers from washing out. If you follow these steps, you will keep your project safe and enjoy a clean look for many years.
When you choose a sand-set system, you get a path that moves with the earth. This method uses polymeric sand for porcelain pavers to fill the gaps between units. It keeps the surface firm but lets it flex under heat or heavy weight. This ability to flex prevents the small cracks that often ruin stiff patio surfaces. Many experts use this for 3cm porcelain paver installation because it handles weight well.
Proper drainage is another big win for sand-set builds. According to the Environmental Protection Agency, porous systems allow rain to soak back into the soil. This reduces runoff and keeps your yard dry. It is a smart choice for Florida homes in towns like Jupiter or Boca Raton where heavy rain is common. A sand-set base helps the water find a path to the ground without pooling. For pool decks, installing 2cm porcelain pavers with sand joints ensures the area stays safe and dry.
Mortar joints create a stiff bond that does not allow for movement. Porcelain pavers are very dense and do not grow or shrink like other stones. When the ground shifts, a stiff mortar joint will likely snap or pop loose. These gaps then let water seep under the pavers. This trapped water can cause the base to wash out over time.
Mortar also blocks all natural drainage through the joints. This forces water to sit on top of the tiles or run off the edges in large streams. This often leads to soil wear or slick spots on your patio. Because porcelain does not soak up much water, it works best when the system around it can handle moisture.
Repairing a sand-set patio is a simple task. If a paver breaks, you can lift it out without hurting the units next to it. You just add more sand and set a new piece in place. This is much easier than taking out old mortar. You do not need power tools or heavy dust masks for these small fixes.
Long life is much more likely with a sand-set base. The sand binds the pavers together while allowing them to breathe. It stops weeds and bugs from getting into the joints. This keeps your outdoor space looking clean for many years. You will spend less time on upkeep and more time enjoying your yard.
| Feature | Sand-Set Joints | Mortar Joints |
|---|---|---|
| Flexibility | High: moves with the ground. | Low: prone to cracking. |
| Drainage | Excellent: water passes through. | Poor: causes surface runoff. |
| Ease of Repair | Easy: replace single pavers. | Hard: must chip out mortar. |
| Durability | High: resists weather shifts. | Low: joints snap and pop. |
Yes, you can use specialized polymeric sand to seal porcelain paver joints. It is a highly recommended alternative to mortar that locks the pavers securely in place while retaining flexibility.
Yes, properly applied polymeric sand creates a solid joint that effectively stops weed growth. It also prevents ants and other burrowing insects from digging into the base layers.
For most porcelain paver projects, the recommended joint width is less than 1 inch. Spacers ensure a minimum gap of 3/16 of an inch for proper sand-set drainage.
No, premium porcelain pavers are dense and never require sealing. However, using polymeric sand in the joints is highly recommended to stabilize the sand-set system.
Taking the time to stabilize your porcelain paver joints with premium polymeric sand prevents the shifting, weed growth, and erosion that can compromise your outdoor hardscape. By implementing a professional sand-set installation method and securing the joints properly, you protect your investment from heavy Florida rains and keep your patio looking flawless. Enjoy a beautiful, low-maintenance outdoor living space that remains structurally sound and visually stunning for decades of outdoor entertaining.
Ready to schedule a free project design consultation or order premium samples? Call (561) 998-5000 right now to speak with our expert team and begin your porcelain paver transformation today.


