
27 Aug
A porcelain paver project timeline is a sequence of decisions and site activities. It covers material confirmation, site preparation, sand-set installation, inspections, and handoff. The calendar is not simply a count of installation days. It begins when the team defines the space and ends when the homeowner or facilities team accepts the finished work.
Talk with Hardscape.com about your porcelain paver project plan and material needs.
For many projects, planning references describe roughly four to eight weeks from design through completion, but that range is not a promise. A compact, accessible site with an approved layout may move differently from a large commercial space. Complex patterns, drainage coordination, weather, and approvals can all affect the sequence. The useful question is not only, "How long will it take?" It is, "What must be decided before the next team can proceed?"
This guide follows that decision-based sequence. It explains what each participant should prepare, where delays commonly originate, and how to keep the handoff organized. The goal is a schedule that reflects the actual project rather than an attractive but unreliable fixed-duration estimate.
A porcelain paver project timeline is the sequence of decisions, site work, material coordination, installation, inspection, and handoff that moves an outdoor space from concept to completion. It is more useful than a single promised start or finish date because each stage has a decision gate. The next stage should begin only after the information, materials, and site conditions needed for it are confirmed.
As a broad planning reference, projects may span approximately four to eight weeks from design through completion. This range is not a guarantee or a universal schedule. The actual timeline depends on project size, site preparation, layout complexity, weather, approvals, material coordination, and the availability of the teams involved. Installation itself may take anywhere from a few days to several weeks, depending on the same factors. Review the porcelain paver material comparison for the source context behind these planning references.
| Stage. | Primary decision. | Timing drivers. |
|---|---|---|
| Design. | Use, layout, drainage, access. | Revisions and approvals. |
| Materials. | Pavers, cuts, coping, accessories. | Availability and delivery. |
| Preparation. | Excavation, elevations, base. | Site conditions and weather. |
| Handoff. | Joints, inspection, records. | Waiting periods and open items. |
The first gate is scope approval. The project team confirms the intended use, dimensions, layout, drainage approach, access requirements, and overall design direction. A clear scope prevents site work from beginning before important choices are settled.
The second gate is material confirmation. The selected pavers, thickness, colors, sizes, coping, edging, spacers, and other required accessories should be identified in writing. Quantities and cut requirements also need review. Unresolved selections can create rework or interrupt the sequence after preparation has started.
The third gate is site readiness. The installation team evaluates existing conditions, establishes the work area, confirms access, and completes the planned excavation and base preparation. Porcelain pavers are installed using a sand-set system, and the prepared base must match the approved installation plan before setting begins.
The fourth gate is installation completion. The team sets the pavers, checks alignment and transitions, and confirms that the field is stable and complete before the specified joint material is applied. Any product-specific waiting or curing requirement should come from the installation plan and applicable product guidance, rather than from a fixed assumption.
The final gate is inspection and handoff. The completed work is reviewed against the approved scope, the area is cleaned, care information is provided, and any open items are documented for resolution. Weather or a site issue can shift one stage without changing the overall design intent, which is why realistic schedules include coordination time.
The bottom line: A porcelain paver project timeline includes design approval, material confirmation, site preparation, sand-set installation, joint completion, inspection, and handoff. Four to eight weeks is only a general design-to-completion reference. Project scale, site conditions, layout complexity, weather, approvals, and coordination determine the schedule that fits a specific project.
Start with the site, not the product catalog. A useful assessment records the areas involved, existing conditions, access points, grade changes, drainage patterns, and the intended use of each space. The University of Georgia Extension identifies site assessment as the first step in landscape design because it informs planning and execution: site conditions shape the design process.
Walk the property with the homeowner, designer, architect, or project lead and document what the finished space needs to accomplish. A pool deck, outdoor kitchen terrace, driveway, walkway, and commercial courtyard may all require different priorities for circulation, load, appearance, maintenance, and edge details. Note furniture zones, doors, steps, planting beds, utility areas, gates, and any locations where material transitions must be coordinated.
Measurements should be precise enough to support a reliable layout and material takeoff. Record length, width, elevations, slopes, corners, curves, thresholds, and the locations of drains or other site features. The brief should also identify who approves the layout, who confirms product quantities, and who coordinates field changes. Planning well before installation helps ensure that materials and logistics are ready when work begins, as UGA Extension explains in its guidance on preparing for landscaping work: detailed planning supports later execution.
Drainage deserves an explicit design conversation. Confirm where water currently moves, where it should be directed, and whether the proposed system needs a deliberately designed permeable approach. Do not treat a product selection as a drainage plan. The finished elevations, base preparation, joint strategy, and surrounding landscape must work together. Resolve door clearances, transitions, borders, pattern direction, and cut locations before the field team begins.
Review physical samples in the actual light and beside the home's walls, trim, coping, planting, and other selected materials. Compare the intended color, scale, texture, thickness, and pattern with the measured space rather than judging from a screen alone. Then confirm the appropriate product category and accessories with the project team. Hardscape.com's porcelain paver product range includes options across 2CM, 3CM, and 5CM pavers, along with complementary pieces and accessories. The final brief should name the selected products, layout, quantities, edge conditions, drainage approach, and installation responsibilities.
The bottom line: A strong project starts with a measured site assessment, a written design brief, and samples reviewed in context. Resolve drainage, elevations, layout, product fit, quantities, and responsibilities before installation begins. These decisions create a clear handoff between the homeowner or designer and the installation team, reducing avoidable rework.
Material coordination is a schedule gate, not a final purchasing detail. Before site work is placed on the calendar, the team should confirm the paver system, quantities, edge conditions, accessories, delivery requirements, and each party's responsibility for approvals. A clear selection package reduces substitutions, rework, and avoidable pauses.
Hardscape.com offers 2CM, 3CM, and 5CM porcelain pavers, along with porcelain cobblestones, stepping stones, coping, and installation accessories. The appropriate thickness depends on the planned application, design, site conditions, and installation requirements. Review the 2CM porcelain pavers guidance when that format is being considered, then document the selected size, color, pattern, thickness, and intended use.
Quantities should account for the approved layout and its cuts, transitions, borders, steps, and replacement pieces. Do not assume that a simple square-foot calculation captures every requirement. The designer or contractor should reconcile the takeoff against the final plan, confirm which items are included, and identify who approves any change before ordering.
Cuts and edge conditions often determine whether the material package is genuinely complete. Confirm coping dimensions, corner conditions, stair or elevation transitions, drainage details, and any special pieces before delivery. Accessory decisions matter just as much. Spacers, joint material, edge restraints, and other specified components should match the selected system and the installation plan. The team can review porcelain paver spacers early instead of discovering during setting that the required spacing tools were not included.
Joint material also needs a written decision. Use the product and installation guidance to identify whether polymeric sand or another specified joint material is appropriate for the design. Pavers must be fully set and the base stable before joints are filled. If the plan requires curing or a condition-specific inspection first, that checkpoint belongs in the schedule rather than being treated as an informal field decision.
Availability should be confirmed for the complete approved package, including the main pavers and less visible accessories. Confirmation is not the same as promising a fixed lead time. Record what is available, what remains subject to confirmation, and when the next procurement check will occur. Also document the delivery address, unloading area, vehicle access, site protection, storage location, and who will inspect materials on arrival.
Assign responsibilities in writing. The homeowner or developer can approve selections and access arrangements. The designer or architect can finalize the layout and details. The contractor can validate quantities, sequencing, and site readiness. A qualified professional should be evaluated for design capability, project-management experience, and commitment to quality, as recommended by the University of Georgia Extension. Clear ownership lets the team resolve a missing cut, accessory, or approval before it affects field production.
The bottom line: A dependable schedule begins with a complete, approved material package. Confirm thickness fit, quantities, cuts, coping, spacers, joint material, availability, delivery access, and handoffs before installation is scheduled. When every decision has an owner and a documented checkpoint, the project is less likely to pause for preventable procurement or coordination issues.
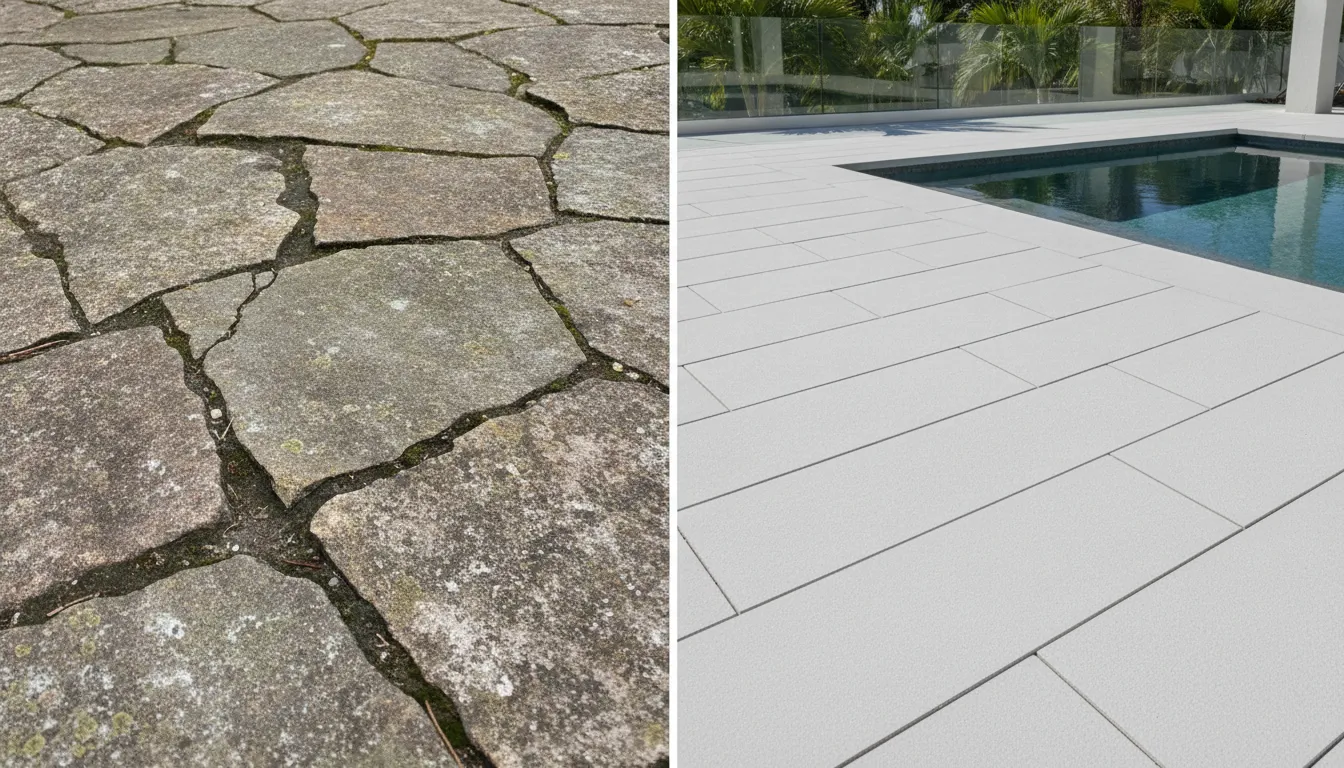
A well-managed installation moves through defined checkpoints rather than treating placement as a single event. The crew first confirms the site conditions and approved layout, then prepares a stable base before placing porcelain pavers in a sand-set system. The sequence follows site analysis, excavation, base preparation, setting, and joint completion, while the project's size, access, weather, drainage design, and layout complexity affect the working schedule.
Planning early helps keep materials, labor, access, and inspections coordinated. It also gives the designer, contractor, and owner clear decision points when field conditions differ from the original assumptions. A realistic porcelain paver project timeline accounts for those decisions instead of promising a fixed installation duration.
The bottom line: Sand-set installation is a controlled sequence of assessment, excavation, base preparation, placement, joint planning, and inspection. Confirming grades, drainage, spacing, and scope before each checkpoint protects the design and reduces rework. The right schedule is the one that reflects actual site conditions and completed verification, not an arbitrary promise.
A coordinated project schedule depends on clear decisions, confirmed responsibilities, and timely communication. Each participant controls a different decision gate. So the schedule stays healthier when no one assumes another team member has handled an approval, material confirmation, site-access detail, or inspection request.
Homeowners should approve the design scope, selected porcelain pavers, layout, coping, accessories, and final design details before procurement begins. Confirm who can authorize substitutions if availability changes, and provide one reliable contact for decisions. Before mobilization, resolve gate access, parking, storage, pets, irrigation concerns, and any restrictions on working hours. Keep the approved plan, product selections, and open-item list together so questions can be answered without restarting the design conversation.
Designers and architects should document dimensions, patterns, transitions, drainage intent, edge conditions, and inspection checkpoints in a coordinated plan. A site assessment informs planning and execution, making early verification especially important when grades, utilities, access, or existing landscape elements affect the sequence. The University of Georgia Extension identifies site assessment as the first step in the landscape design process: site conditions should guide the plan. Confirm the material schedule and installation responsibilities with the contractor, then issue revisions through one controlled process.
Contractors should confirm quantities, delivery status, cutting requirements, accessories, crew readiness, and the planned work areas before starting. Coordinate excavation, base preparation, sand-set placement, joint work, cleanup, and inspections in the correct order. Do not schedule a dependent activity until the preceding work has been checked and accepted. Build weather awareness into daily planning, especially when rain could affect access, preparation, material handling, or inspection conditions. Report a constraint early with a proposed adjustment, rather than allowing an unresolved detail to become rework.
Commercial developers, owners, and facility teams should align the landscape plan with procurement, site logistics, public access, safety requirements, inspections, and adjacent trades. Identify blackout dates, delivery routes, staging areas, and the person authorized to release each work zone. For hospitality and restaurant projects, this commercial porcelain paver planning guide provides a useful framework for coordinating design, operations, and installation decisions. Hold short recurring check-ins that track approvals, procurement confirmation, weather impacts, inspection results, and the next owner for every open item.
The bottom line: Keep the schedule moving by assigning every decision to a named owner, confirming materials and access before mobilization, and sequencing work around inspections. Homeowners, designers, contractors, and commercial teams should share one current plan, communicate weather or site changes early, and close open items before they affect the next activity.
Final inspection is the decision gate between installation work and active ownership. The contractor, designer, and homeowner or facilities representative should walk the completed area together and compare it with the approved scope. Confirm that the surface, edges, joints, transitions, drainage details, and access points are ready for use.
Joint completion belongs near the end of the installation sequence. The pavers must be fully set and the supporting base stable before the specified joint material is installed. The appropriate wait depends on the approved system, weather, site conditions, and product guidance. A reference to 24 to 48 hours may apply when curing is necessary, but it should never be treated as a universal project rule. Confirm the release point with the responsible installer.
Before joint filling, the team should review alignment, cuts, edge restraints, elevations, and any areas that need correction. This is the right time to identify an open item rather than conceal it under final cleanup. For projects designed to manage runoff, verify that the completed joint and drainage approach matches the approved plan. Permeable pavement can support stormwater management when the system is designed and installed appropriately, as the EPA explains at its permeable pavement resource.
Cleanup should leave the area safe, accessible, and ready for the next user. Remove construction debris, packaging, excess joint material, protective materials, and temporary markers. Check adjacent doors, drains, planting areas, pool or patio edges, and pedestrian routes for residue or damage. Record photographs of the completed work and note any approved deviations from the original scope.
The final walk-through should produce a short, written open-item list with an owner for each item and a clear plan for resolution. Include the agreed product names, sizes, quantities, accessory information, color selections, layout drawings, and installer or supplier contacts. If spare pavers or accessories remain, label them and record where they are stored. These records help future repairs match the original installation instead of relying on memory.
At handoff, explain routine care, appropriate cleaning practices, furniture or equipment considerations, and who should be contacted for questions. The homeowner or facilities team should acknowledge receipt of the care guidance, product records, photos, and open-item list. Responsibility transfers only when both parties understand what is complete, what remains, and how follow-up will be handled.
The bottom line: A porcelain paver project timeline is complete when the joints follow the approved system and the area has passed a documented inspection. Cleanup is finished, records and spare materials are organized, and the homeowner or facilities team accepts responsibility with every open item assigned.
On-site installation can take anywhere from a few days to several weeks, depending on project size, site preparation, layout complexity, weather, and coordination. Treat any duration as a planning reference, not a fixed promise. Confirm the sequence and checkpoints with the installation team before work begins.
From design through completion, a project may span about four to eight weeks as a general planning reference. The actual schedule depends on site conditions, approvals, material and accessory confirmation, access, and team availability. A written scope with decision dates is more useful than relying on a standard calendar.
The core sequence is site analysis, excavation, base preparation, sand-set paver installation, inspection of alignment and levels, and final joint filling. Product selection, layout approval, access planning, and material confirmation should happen first so installation can proceed without avoidable rework.
Wait until the pavers are fully set and the base is stable. If the specified system requires curing, the applicable product guidance may call for roughly 24 to 48 hours before joint filling. The installer should confirm the correct timing for the selected materials and site conditions rather than applying a universal rule.
The largest variables are project scale, excavation and base preparation needs, layout complexity, weather, approvals, site access, material availability, and communication among the homeowner, designer, supplier, and installer. Early site assessment and written decisions help identify dependencies before they affect the schedule.
A clear conversation can help align material choices, project coordination, installation planning, inspections, and homeowner handoff with your specific needs.
Contact Hardscape.com to discuss your project materials and next steps. You can also reach the team at 561-998-5000.
The bottom line: Contact Hardscape.com when you are ready to turn your porcelain paver project plan into a coordinated path forward.