14 Oct
A pool edge can look like a simple row of coping, but replacement planning depends on details that are easy to overlook. Existing dimensions, edge profiles, product markings, adjacent deck elevations, and open joints can all affect what should be documented before work begins.
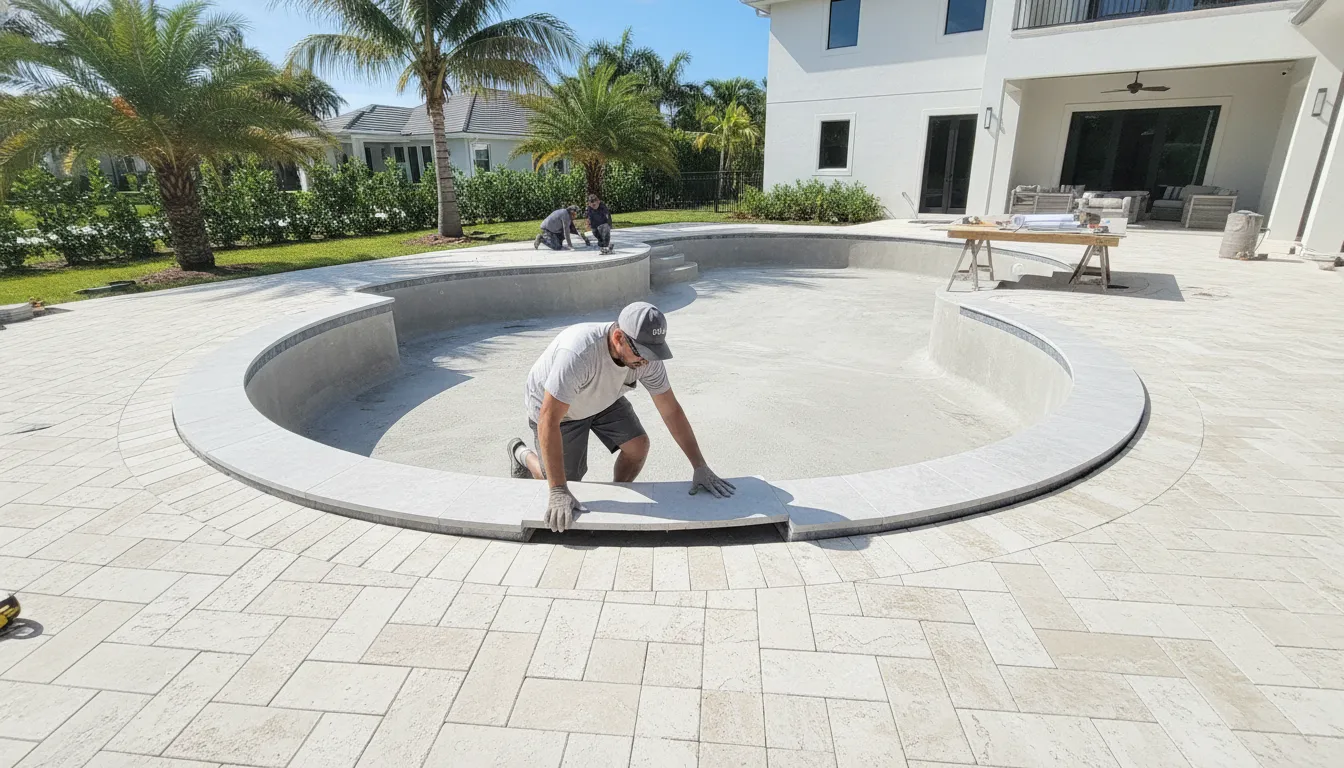
A successful pool coping replacement starts with a clear record of the existing edge. Record the porcelain coping product code, size, color, thickness, profile, surrounding surfaces, and visible site conditions. That information gives you and your installer a practical basis for checking compatibility, coordinating transitions, and identifying questions that need answers before materials are selected.
For a Florida pool renovation, the most useful checklist is not simply a list of products. It is a record of what is there now, what must connect to it, and what remains uncertain. Begin by documenting the pool edge and the surrounding deck so the replacement conversation is based on observable details rather than assumptions.
Before selecting replacement coping, create a concise record of the pool edge as it exists today. Measurements and photographs give you a practical starting point for a site-specific discussion with your installer. They also help distinguish a localized replacement from a project that requires coordination with the surrounding deck.
The bottom line: A useful replacement record combines measurements, profile details, adjacent-surface information, condition photos, and product clues. Bring that record to the installer. Treat every dimension and product match as something to verify at the pool rather than as a universal assumption.
A close visual review can help separate a concern with one coping unit from a condition affecting the wider pool edge. Treat each observation as a prompt for further evaluation, not as proof of a specific cause. The appropriate response depends on the existing edge, surrounding surfaces, and the product selected for the project.
One chipped, cracked, or visibly damaged piece may point to a localized replacement need. Record where it occurs and whether nearby pieces appear stable and consistent. A photograph, the product marking, or a retained sample can help an installer compare the existing piece with current porcelain coping options. Do not assume that a similar-looking piece will match in size, color, thickness, or profile.
Gaps, shifted pieces, or joints that look different from the surrounding edge may indicate that the issue extends beyond one unit. These signs can also reflect conditions at the edge or adjacent surface, so they should be reviewed in context. Note whether the concern appears in one location or repeats around several sides of the pool.
Repeated displacement, uneven-looking transitions, or a noticeable change where the coping meets the surrounding deck deserves a broader assessment. Observe the relationship between the coping, the adjacent porcelain surface, and the pool edge without assuming that appearance alone identifies the cause. Drainage and support conditions may also require installer review. The customer guidance does not establish a universal dimensional standard, compatibility rule, or replacement method, so site-specific verification matters.
If the condition is unclear, document the area before work begins and ask the installer what must be assessed. Confirm which product details matter and how the proposed coping will coordinate with adjacent surfaces. A qualified installer and current product documentation should guide the final decision.
The bottom line: Visible damage may be isolated, while repeated movement, open joints, or inconsistent transitions can signal a wider pool-edge concern. Document what you see, preserve product clues, and have the edge, adjacent surfaces, and proposed replacement reviewed together before deciding on pool coping replacement.
A replacement piece should be evaluated as a complete product specification, not selected by appearance alone. Start with any product code, box label, invoice, sample, or retained piece from the original installation. A code can help identify the collection and configuration, but it should still be checked against current product information before an order is placed.
Record the existing coping's measured length and width, color, thickness, and edge or profile shape. Hardscape.com's portfolio includes coping profiles such as Eased, Remodel, and Full Round Bullnose. But the appropriate profile depends on the existing pool edge, the adjacent deck, and the specific product. Do not assume that a similar-looking edge will create the same transition.
Confirm that the proposed piece is intended for the pool-edge application and that its dimensions coordinate with the surrounding layout. The matching process should account for how the coping meets adjacent porcelain pavers, returns around corners, and relates to the pool edge. A product that looks close in a photograph may still be unsuitable when its thickness, edge geometry, or installation requirements differ.
Color should also be reviewed with a physical sample when possible. Outdoor light, water, existing materials, and weathering can affect how a replacement appears beside older work. Keep the sample and product records available for the installer, especially if the original collection is no longer readily available.
Current availability is part of product matching. Ask whether the identified code, color, size, thickness, and profile remain available, and whether the proposed replacement is compatible with the site-specific system. Hardscape.com offers porcelain coping options and porcelain paver products for review, but current product documentation and installer verification should guide the final selection.
The bottom line: Match the product code, dimensions, color, thickness, edge profile, and intended application, then confirm availability with current documentation and a sample. A qualified installer and product specialist can determine whether the proposed coping suits the existing edge and adjacent porcelain surfaces. Do not promise an exact match in advance.
Pool coping replacement should be planned as part of the pool edge, not as an isolated row of pieces. The coping, adjacent field pavers, and transition area need to be reviewed together so the installer can confirm how the surfaces meet, where joints occur, and whether the existing deck elevation affects the proposed layout.
Start by recording the current coping dimensions, edge or profile shape, adjacent porcelain paver size and elevation, and visible conditions at the pool edge. These observations are planning information, not a universal dimensional standard. The final selection depends on the site and the specific product, so confirm the details with a qualified installer and current product documentation.
Coordination checks for a porcelain pool edge| Area | What to check | Why it matters |
|---|---|---|
| Coping | Existing dimensions, edge profile, pool-edge conditions, product markings, and the proposed replacement details. | Confirms what must be verified before selecting a compatible coping piece. |
| Adjacent field pavers | Porcelain paver size, thickness, color, layout direction, elevation, and relationship to the pool edge. | Helps the installer coordinate the visual line and the meeting point between surfaces. |
| Transition and joint area | Joint locations, changes in elevation, edge conditions, drainage observations, and the approved accessory or spacing approach. | Identifies details that should be resolved before work begins rather than improvised during placement. |
A photo set can make this review more useful. Include straight-on views of the pool edge, wider images showing the deck pattern, and close-ups of markings or samples. When discussing spacing or layout, review the project-specific porcelain paver spacers and other installation accessories with the installer rather than assuming one setup applies to every replacement.
For Florida renovations, especially projects around Jupiter, Boca Raton, or Fort Myers, document the existing edge before ordering materials. A coordinated review gives the homeowner, designer, contractor, and supplier the same reference point for discussing product compatibility and the transition between the pool coping and deck.
The bottom line: Treat coping, field pavers, and their transition as one coordinated design review. Record dimensions, profiles, elevations, joints, and edge conditions, then confirm the site-specific product and accessory choices with the installer before pool coping replacement begins.
A clear conversation with the installer can turn an uncertain pool coping replacement into a defined project plan. The answers should reflect the existing pool edge, the selected porcelain product, and the surrounding deck rather than a one-size-fits-all method. Ask these questions before work begins:
The bottom line: The best installer questions connect four pieces: the existing edge condition, the selected coping, the adjacent deck, and the approved sand-set system. Ask for site-specific verification, product documentation, joint coordination, schedule clarity, and completion records before pool coping replacement begins.
A successful replacement begins with planning the pool edge as part of the surrounding outdoor surface, not as an isolated row of pieces. The sequence below is intentionally high level. A qualified installer should confirm the existing conditions, the selected porcelain product, and the approved sand-set system before work begins.
Start by coordinating access around the pool and protecting nearby porcelain pavers, landscaping, coping that will remain, and pool equipment. The installer should clarify how the swimming area and adjacent surfaces will be managed during the project. Preparation also includes identifying the work limits so removal and cleanup do not create avoidable disruption beyond the replacement area.
Record the coping dimensions, edge or profile shape, adjacent deck material, elevation relationship, visible pool-edge conditions, and any product markings or retained samples. Then assess whether the concern appears limited to individual units or may involve movement, open joints, drainage, or the supporting edge. These observations are prompts for installer verification, not a diagnosis or a universal repair method.
Review the product code, size, color, thickness, and profile against current product materials. Hardscape.com offers coping profiles such as Eased, Remodel, and Full Round Bullnose, but availability and compatibility must be confirmed for the specific project. If the replacement coordinates with adjacent pavers, compare the relevant product documentation and samples rather than assuming an exact match.
Before installation, align decisions about transitions, joints, spacers, and the surrounding porcelain surface. The 2CM porcelain paver guide and porcelain paver spacers page can support the planning conversation, while current product guidance should control site-specific details. After the work, inspect alignment, transitions, joints, and the edge condition, then retain product records for future reference.
The bottom line: Pool coping replacement should move from site documentation to condition assessment, product verification, coordination, approved sand-set guidance, and final inspection. The correct sequence depends on the existing edge and selected product. Use your records to ask focused questions and confirm each decision with a qualified installer and current Hardscape.com guidance.
Before considering the project complete, walk the pool edge with the installer and compare the finished work with the planning records. Look along the coping line from several viewpoints. Check that the pieces appear visually aligned, the edge profile is consistent where it should be, and the transition into the adjacent deck looks intentional rather than abrupt.
Pay particular attention to changes in elevation, corners, returns, and areas where coping meets field pavers or another surface. Review the joints for consistent appearance and note any locations that look open, uneven, or otherwise different from the agreed installation plan. Do not assume that a visual concern has one universal remedy. Ask the installer to explain what was observed and what, if anything, needs correction.
Also discuss water movement around the pool edge. Look for visible ponding, blocked paths, or drainage behavior that differs from the pre-project condition. A meaningful assessment depends on the site and current conditions. If the replacement exposed a broader edge or support concern, pause and request a site-specific explanation before approving the work.
Save the product name, code, size, color, thickness, edge profile, samples, and installer notes with your project photos. Product-specific specifications should be checked against current manufacturer or supplier materials rather than assumed from a similar-looking piece. Final selection and any follow-up work depend on the site and the specific product.
For practical upkeep planning, review Hardscape.com's porcelain paver maintenance schedule and keep the records available for future repairs or additions. Escalate promptly if alignment remains visibly inconsistent, joints appear unresolved, water behavior raises concern, or the installed product does not match the documented selection. Hardscape.com provides consultative product guidance for residential and commercial projects; contact the team when a product or coordination question remains unresolved.
The bottom line: A careful post-project review confirms more than appearance. Check alignment, transitions, joints, and visible drainage behavior with the installer, then preserve product records and maintenance guidance. If the result differs from the agreed plan or reveals a broader concern, document it and request a site-specific response before treating the replacement as complete.
Contact Hardscape.com about your pool coping replacement plan.
Photograph the full pool edge, corners, transitions, joints, and any damaged areas. Record the existing coping dimensions, edge profile, product markings, color, thickness, and the relationship between the coping and adjacent deck. These details give your installer and product adviser a useful starting point.
Ask the installer to inspect the surrounding edge, support, joints, transitions, and adjacent surface rather than assuming the visible issue is isolated. A site assessment can help distinguish a single-unit concern from conditions that may affect a larger section. The appropriate replacement plan depends on what is found at the pool.
Bring clear photos, measurements, product markings, and a sample if one is available. Compare the coping size, color, thickness, edge profile, and adjacent pavers together. A visual match alone may not confirm compatibility, so ask the supplier or installer to verify the current product details and the proposed combination.
Ask how the existing edge will be documented, which conditions must be corrected, how the coping will coordinate with the adjacent deck, and which products and accessories are approved for the project. Also ask how transitions and joints will be handled, what information they need from the product supplier, and what the final inspection will cover.
Yes, but the selection and installation plan should be based on the specific pool edge, surrounding surfaces, product details, and installer assessment. Florida projects in areas such as Jupiter, Boca Raton, and Fort Myers can benefit from documenting site conditions early and confirming product compatibility before ordering materials.
Reviewing the existing edge, product details, and surrounding porcelain surfaces together can make the next conversation with your installer more focused. Hardscape.com can help you review coping options and organize the product information needed for your project.
Contact Hardscape.com to review your product details and plan your project. You can also reach the team at 561-998-5000.